Description
1 – Product Acceptance
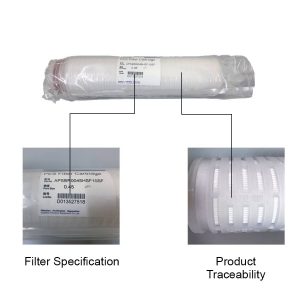
- Please check and make sure that packaging is clean and closed (intact) and confirm that the type and quantities of the filter meet all requirements.
- Store the filters in a cool, dry, and clean environment.
- Please note that the shelf life is 3 years.
2 – Filter Use
Please ensure that the internal packaging is clean and verify the filter model and product number.
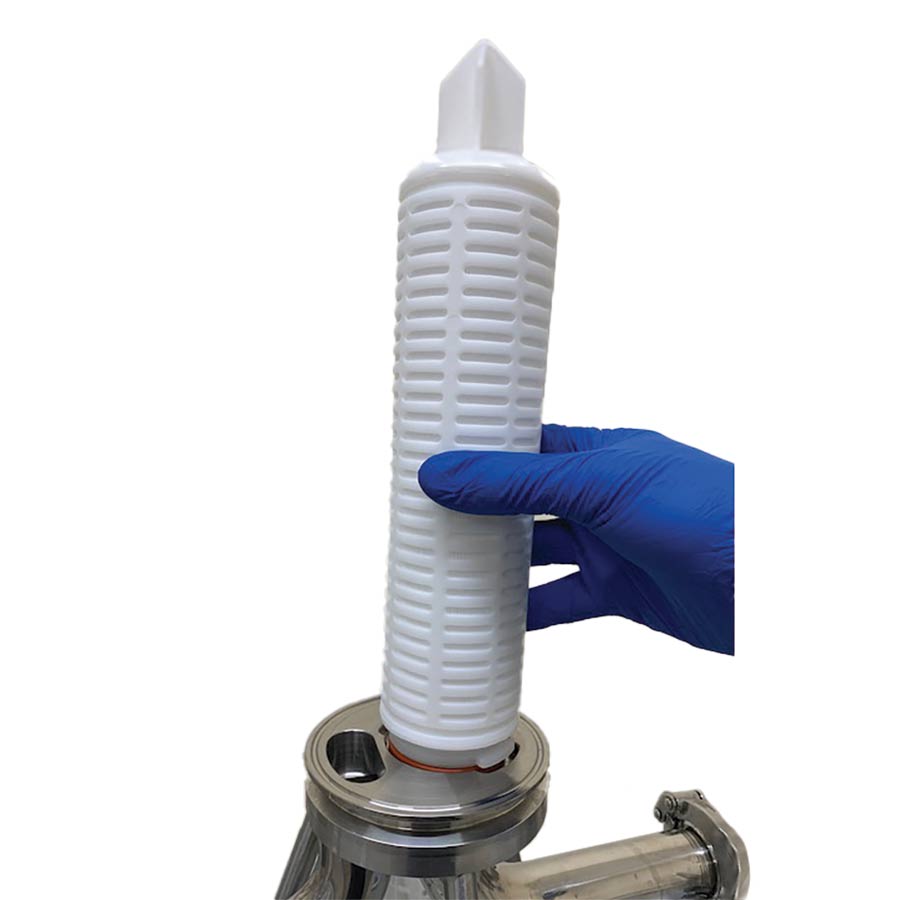
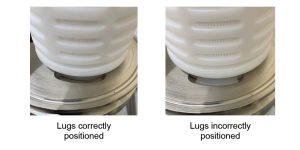
Prior to installation, you MUST pre-wet the O-Ring to facilitate installation. Install the filter vertically into the housing, correctly align, and then rotate approximately 90°.
Please install filter vertically into the housing

If you require Integrity Testing, please ensure that the filter is compatible with Integrity Testing by referring to guidelines for filter integrity testing.
If you require steam sterilization, please ensure that the filter is compatible with steam sterilization by referring guidelines for filter steam sterilization. The filter Quality Assurance Certificate indicates the suitable pressure and temperature ranges.
Please pay attention to filter flow rate direction and ensure proper filter sealing with the filter housing.
We RECOMMEND doing a pre-flush treatment prior to filtering.
- Recommended Flush Time is 5min.
- Flush Volume is 20L/min per 10 inch filter.
Please note: Flushing time and volume CAN BE adjusted per application requirements.
Open the exhaust value when filtering has begun to remove gas. When liquid starts to flow from the outlet, tighten the exhaust valve.
Please note: This is ONLY suitable for liquid filter housings.
Use the suitable pressure and temperature range highlighted in the filter Quality Insurance Certificate. Filter pressure endurance ability will reduce when temperature is increasing. Avoid large differential pressure changes on filters.
When used for gas filtration applications, condensate water MUST be drained.
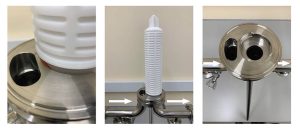
3. Filter cartridge installation
Gloves must always be used when handling sterile grade filters.
Open the bag containing the new filter at the end with o-rings and wet the o-rings with purified water or the fluid being filtered. DO NOT TOUCH THE FILTER WITH BARE HANDS OR FINGERS. The bag should tear by hand where marked, do not use a box cutter or blade to open the bag.
With the new filter still in the bag, push the o-ring end into the filter housing head using a twisting motion to assure a complete seal. If the filter has a 2-226 or 2-223-Tab o-ring configuration, make sure that the locking tabs engage with the tab holders in the housing head. (To prevent inadvertent contamination of filter, do not directly touch filters with your hands.)
Remove the bag and replace the filter housing bowl.
4 – Filter Replacement
Replace the filter per manufacturers instructions.
Per GMP requirements, the cycle use of sterilizing-grade filter is NO MORE than 1 working day. In addition,please refer to the following parameters to replace the filter:
- Maximum allowable differential pressure.
- Flow rates MUST meet the requirements
- Steam Sterilization cycles
- Integrity Test Results